实现串口中断接收
通过前面的学习我们已经调试好了串口SIO驱动发送功能、中断系统和系统TICK功能,现在最小系统已经被我们完成了90%了,就剩最后一步我们需要实现串口使用中断接收数据的功能,这样我们才能在shell上输入命令和SylixOS进行交互。
要实现串口接收功能我们需要在uart.c中实现3个接口:
VOID  uartGetChar (PCHAR  pcChar)
{
    *pcChar = readb(UART0_BASE + RBR);
}

BOOL  uartIsRcvFifoEmpty (VOID)
{
    return  (!(readl(UART0_BASE + USR) & BIT(3)) ? TRUE : FALSE);
}

VOID  uartEnableRcvInt (VOID)
{
    writel(readl(UART0_BASE + LCR) & ~BIT(7), UART0_BASE + LCR);
    writel(BIT(0), UART0_BASE + IER);
}
- uartGetChar:这个接口从寄存器中读取一个字节数据。
- uartIsRcvFifoEmpty:用于检测接收FIFO中是否有数据,全志R16使用的是16550兼容的UART控制器,发送和接收都有64字节的FIFO进行缓冲。当收到数据时,数据首先存放到接收FIFO中,当数据个数满足事先设置的阈值(默认是1个字节)时产生一个中断。
- uartEnableRcvInt:使能UART控制器的接收中断。
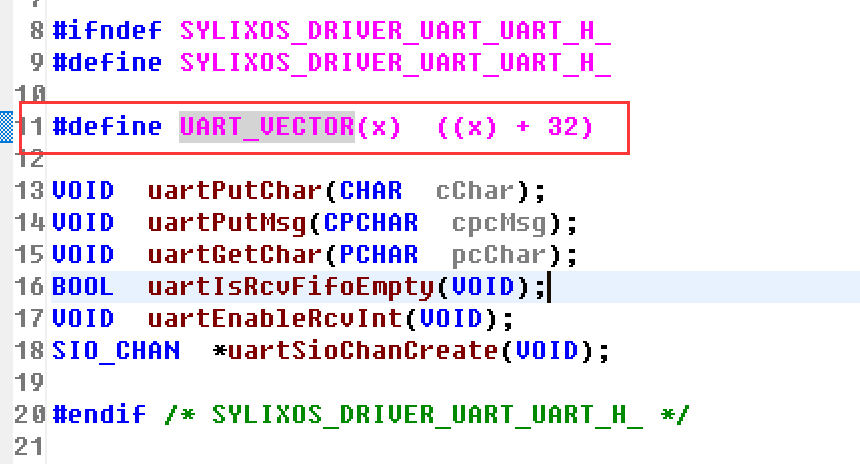
同时将串口中断号使用宏定义在uart.h中以让外部文件使用:
接下来我们就要在sio.c中实现串口接收中断处理函数了:
static irqreturn_t  uartSioIsr (PVOID  pArg, ULONG  ulVector)
{
    CHAR  cChar;

    /*
     *  TODO:清除中断
     */


    while (!uartIsRcvFifoEmpty()) {
        uartGetChar(&cChar);

        uartPutRcvChar(pRxArg, cChar);
    }

    return  (LW_IRQ_HANDLED);
}
逻辑也很简单,首先判断接收FIFO中是否有数据,如果有数据就从中读取一个数据,再通过uartPutRcvChar 接口把接收的数据上送到系统接收缓冲区。有的UART控制器可能需要在中断处理函数中清除中断状态,但是全志R16使用的UART控制器不需要。
中断处理函数编写完成之后,通过API_InterVectorConnect 接口注册到系统中:
SIO_CHAN  *uartSioChanCreate (VOID)
{
    uartSioChan.pDrvFuncs = &uartSioDrvFunc;

    API_InterVectorConnect(UART_VECTOR(0),
                           (PINT_SVR_ROUTINE)uartSioIsr,
                           NULL,
                           "uart_isr");

    return  &uartSioChan;
}
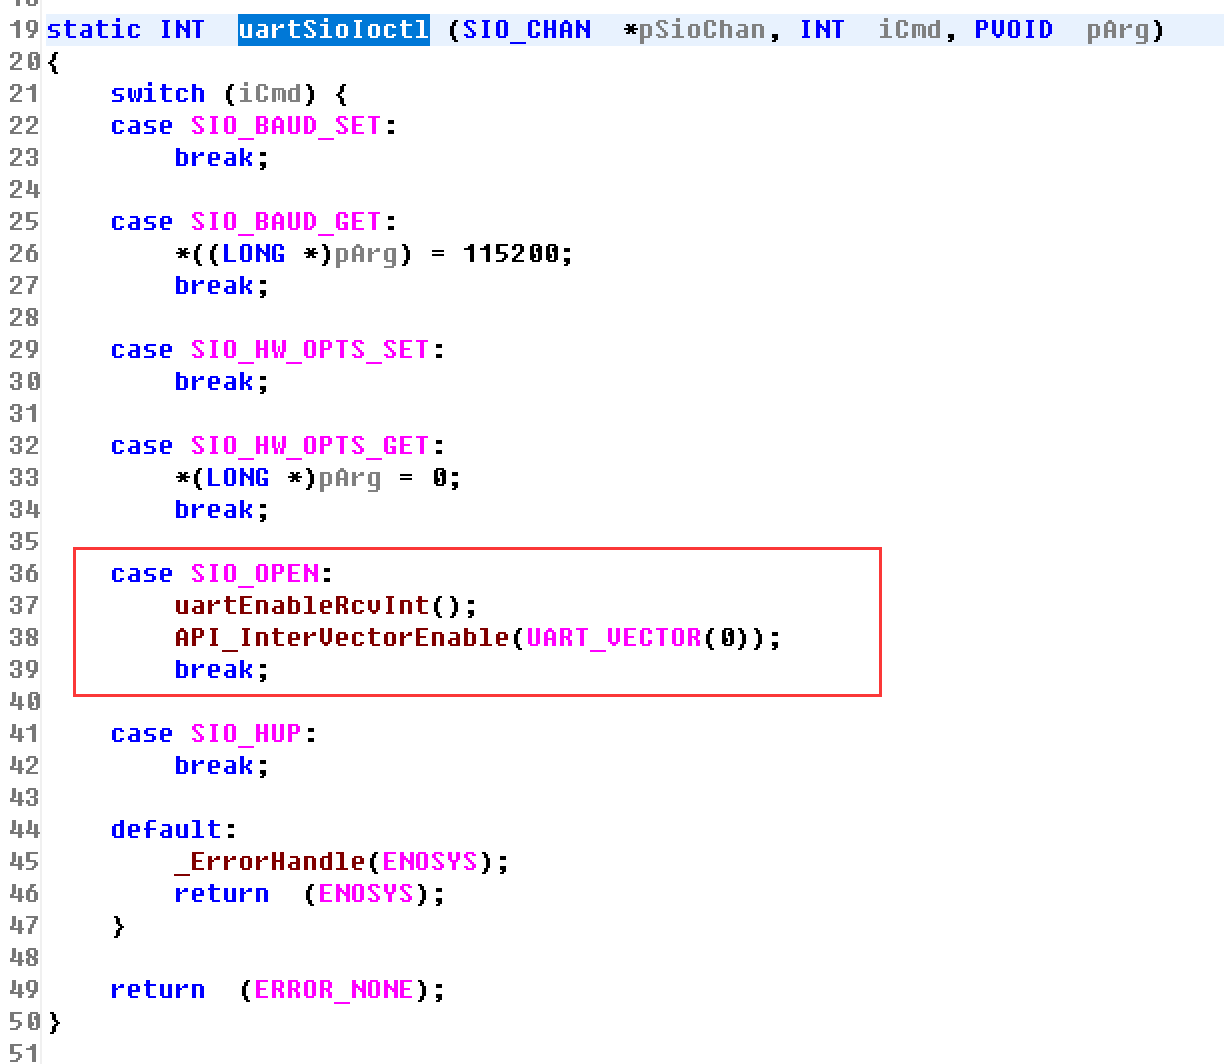
最后将中断使能的操作放在打开SIO通道的ioctl中:
重新编译内核进行引导,这次我们就可以在串口终端上输入命令了:
[root@sylixos:/root]# top
CPU usage checking, please wait...
CPU usage show (measurement accuracy 1.0%) >>

       NAME        TID    PID  PRI   CPU   KERN
---------------- ------- ----- --- ------ ------
t_tshell         4010010     0 150   0.0%   0.0%
t_telnetd        401000e     0 160   0.0%   0.0%
t_ftpd           401000d     0 160   0.0%   0.0%
t_snmp           401000c     0 110   0.0%   0.0%
t_netproto       401000b     0 110   0.0%   0.0%
t_netjob         401000a     0 110   0.0%   0.0%
t_sync           4010009     0 252   0.0%   0.0%
t_reclaim        4010008     0 253   0.0%   0.0%
t_hotplug        4010006     0 250   0.0%   0.0%
t_power          4010005     0 254   0.0%   0.0%
t_log            4010004     0  60   0.0%   0.0%
t_except         4010003     0   0   0.0%   0.0%
t_isrdefer       4010002     0   0   0.0%   0.0%
t_itimer         4010001     0  20   0.0%   0.0%
t_idle0          4010000     0 255  99.9%   0.0%

[root@sylixos:/root]# ps

      NAME            FATHER      STAT  PID   GRP    MEMORY    UID   GID   USER
---------------- ---------------- ---- ----- ----- ---------- ----- ----- ------
kernel           <orphan>         R        0     0        0KB     0     0 root

total vprocess: 1
[root@sylixos:/root]# ts
thread show >>

      NAME         TID    PID  PRI STAT LOCK SAFE    DELAY   PAGEFAILS FPU CPU
---------------- ------- ----- --- ---- ---- ---- ---------- --------- --- ---
t_idle0          4010000     0 255 RDY     0 YES           0         0       0
t_itimer         4010001     0  20 SLP     0 YES       92274         0       0
t_isrdefer       4010002     0   0 SEM     0 YES           0         0       0
t_except         4010003     0   0 SEM     0 YES           0         0       0
t_log            4010004     0  60 MSGQ    0 YES           0         0       0
t_power          4010005     0 254 SLP     0 YES         446         0       0
t_hotplug        4010006     0 250 SEM     0 YES         439         0       0
t_reclaim        4010008     0 253 MSGQ    0 YES           0         0       0
t_sync           4010009     0 252 SLP     0             425         0       0
t_netjob         401000a     0 110 SEM     0 YES           0         0       0
t_netproto       401000b     0 110 MSGQ    0 YES          23         0       0
t_snmp           401000c     0 110 MSGQ    0 YES           0         0       0
t_ftpd           401000d     0 160 MSGQ    0               0         0       0
t_telnetd        401000e     0 160 MSGQ    0 YES           0         0       0
t_tshell         4010010     0 150 RDY     1               0         0       0

thread: 15
[root@sylixos:/root]#
我们还可以通过ints 命令来查看系统的中断情况:
[root@sylixos:/root]# ints
interrupt vector show >>

 IRQ      NAME       ENTRY    CLEAR   ENABLE RND PREEMPT PRIO     CPU 0
---- -------------- -------- -------- ------ --- ------- ---- -------------
  32 uart_isr       40000b8c        0 true                  0            23
  50 tick_timer     40000400        0 true                  0         15687

interrupt nesting show >>

 CPU  MAX NESTING      IPI
----- ----------- -------------
    0           1             0

[root@sylixos:/root]#
通过cat /proc/cpuinfo 来查看当前平台的基本信息,可以看出现在使用的是单核状态:
[root@sylixos:/root]# cat /proc/cpuinfo
CPU         : Allwinner R16, Quad-core Cortex-A7 Up to 1.2GHz
CPU Family  : ARM(R) 32-Bits
CPU Endian  : Little-endian
CPU Cores   : 1
CPU Active  : 1
PWR Level   : Top level
CACHE       : 128KBytes(D-32K/I-32K) L1-Cache per core,512KBytes L2-Cache
PACKET      : ClockworkPI (CPI v3.1) development board
BogoMIPS  0 : 2000.00
[root@sylixos:/root]#


2021年7月2日 09:46 1F
感谢🙏 作者,太强了!我在复旦微芯片做了一遍成功了!